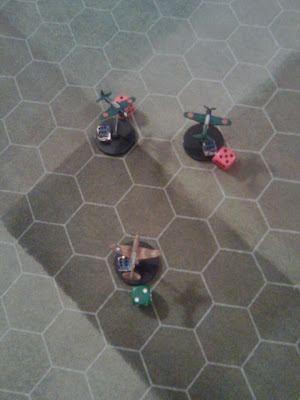
P-40 in a scoring position on a Zero
I've been wanting to try out Check Your 6 for months but other things kept getting in the way, but I finally had a chance to try out the rules in a solo session this evening. This not only allowed me to try out the Check Your 6! rules but also the Hotz Mat I purchased specifically for use with the game.
Disclaimer: I received my copy of Check Your 6 from my friend Mark Fastoso, who designed the Flying Tigers mini-campaign contained in the base game rule book.
I had long wanted to have some tactical aerial warfare rules I could use with my Axis & Allies Miniatures aircraft while still keeping the aircraft available for use with A&A minis. This required a rules set that did not require modifications to the aircraft, special stands and a big investment in extra materials. Check Your 6! fits the bill perfectly.
Now one only has to look at the BoardGame Geek listing or the publisher's Website to know there's lots of ways to enhance the game and add a lot of bling and that's great. But you actually don't need it. A photocopied Move Chart, an A&A miniatures plane model and a couple of D6 and other dice and you're in business.
For instructional purposes I tried a duel between a pair of P-40Bs and a couple of Zero. I decided to mix up the pilot quality a bit in order to explore that important part oft he rules, so I made one P-40 pilot a Veteran and the wingman a Green pilot. Both Zero pilots were Skilled.
I arranged a simple head-on encounter between elements at the same Tactical Altitude Level (4) assumed to be in the Medium Combat Altitude Band. The Hotz map has 2-inch hexes, so it's a little smaller than the standard assumed by the rules (27 hexes across instead of 30). I bought a 2-inch size because I wanted to be able to use the Hotz map with other games that use 2-inch hexes such as Heroscape, Tide of Iron and Lord of the Rings: Tradeable Miniatures Game.
Both sides climbed at first and were at TAL 6 when they pulled into range for a head-on pass. At the last minute the Veteran US pilot took advantage of his edge in skill to sideslip out of the line of fire of the lead Zero. Unfortunately his Green wingman has to follow to maintain formation and ended up in front of the lead Zero at a 2-hex (Close) range. Both planes blasted away and both got hits. The Green pilot managed an airframe hit on the Zero, which would have significance later, but the Zero was able to shoot down the P-40 due to the hitting power of its cannon.
This left the Veteran facing two enemy planes, although the damaged Zero was somewhat constrained in its maneuvers.
The next several turns were spent with wild maneuvering where the superior quality of the P-40 pilot made a big difference. He wasn't able to prevent the Zeros from getting shots, but he was able to prevent them from getting good shots, and eventually the P-40 was able to use a series of Special Maneuvers to get behind the undamaged Zero for a moment. A quick shot that wasn't all that solid still managed to bring down the Zero due to it's poor Robustness.
Faced with an undamaged Veteran P-40 the surviving Skilled but damaged Zero exited the map with a quick dive. Because the P-40 had a dive advantage this counted as exiting off an "Unfriendly" edge and the plane failed the subsequent aircrew check and was considered destroyed after all.
I'm looking forward to trying this with some live opponents. It's detailed enough that I think it's most likely to interest experienced wargamers, although other gamers might like it in a group setting. I think it will work a little better with slightly bigger dogfights. I notice that most of the provided scenarios involves 4-12 aircraft per side.
The Hotz Mat worked fine. laying flat and not being difficult to move the plane models on despite the cloth surface.
No comments:
Post a Comment