Showing posts with label Axis and Allies. Show all posts

Sunday, August 10, 2014

Charge! Polish cavalry tackles tanks in AAM


When I was in elementary school back in the 1960s I had several of the How and Why Wonder books. One in particular that I still remember vividly was the one on World War II. It had, as I recall, a dramatic illustration of Polish cavalry being attacked by German aircraft.
So when a new player of AAM suggested he’s like to try a few DYO scenarios I thought I’d make it interesting by picking one of the minor Allied powers to face his Germans. I happened to have a bunch of Polish cavalry that had never seen the table, so I designed a build that used them – and almost every other 1939 Pole I owned. Actually a few more, as I bought a few more to fill it out from 12-7 games.

Although not intentional, our mutual OBs ended up being reasonably historical, representing a good facsimile of an encounter between the German 3rd Light Division and a Polish Cavalry brigade. About the only departure was the inclusion of a stray Polish 7TP tank.  The German build was 151 points and the Poles were 174, given the 15% bonus for being an all-Polish build.
So, the Polish force comprised the following elements:
10 x Polish Cavalry
9 x Polish Mauser
5 x TKS Tankette
4 x 37mm ATG
4 Minefields
3 x Polish officer
1 ea 7TP tank, Ammo Dump, HQ, and Pillbox
This approximated a Polish cavalry squadron, an infantry company, an anti-tank battery, a tankette platoon and supports

The German opponents were:

Two infantry platoons, each with 1 SS Leader, 3 Mausers, 1 MG34 and a Lt Mtr.
Two tank platoons, each with a Pz IVA and two Pz 38(t)
Air support with a Disciplined Spotter, one Stuka and one Bf 109E

The Poles had to set up first. We used Map Configuration 1 “Villages” Alternate Map layout from Page 7 of the Expanded Rules. The Poles selected the “Left” edge (the side with the numbers) which placed them closer to the objective and gave them some woods, hills and hedgerows for cover.

The cavalry set up in the left woods, ready to advance through the woods and hills in that sector. The HQ and pillbox were to their rear.
On the ridge and central woods were the Polish armor and two infantry platoons.
In the hedgerow field on the right was the ammo dump, the ATG battery and the remaining infantry platoon.
The minefields were set up to block the gaps between the woods on the German side of the map.

The Germans set up with one infantry platoon on the far right in some woods and the other in the central woods behind the small pond. Each platoon had a Pz. IV in support.
The Pz 38(t) all set up on the German left flank, with the Disciplined Spotter.

The Germans won the initiative, which they generally did through the battle. The Poles advanced all along the front, occupying the central village and taking firing positions. The German armor advanced, while the infantry held back for now.

During the first Air Phase the German fighter targeted a cavalry squad while the Stuka took aim at an ATG. Here the Poles caught a vital break, as excellent shooting by two Mausers attached to the ATG actually shot down the Stuka! The Stuka’s destruction of the ATG didn’t make up for this.  In fact, the Poles continued to have good luck with their rifle fire, twice managing to disrupt the fight later in the battle. As a consequence, out of a theoretical total of 14 air strikes the German player only got to implement six! It’s quite likely that this represented the winning difference in the game.

The Polish cavalry in the town was quite chewed up by the nearby German infantry, tanks and fighter aircraft, prompting the Polish commander to pull back the surviving platoon for the time being.

Near the end
On the right the German Pz. 38s tested their luck against the 37s and came out on the short end of the stick, losing three tanks. A big help in the effort was the ammo dump. Eventually the German player took out the dump with the fighter plane, but by then the damage had been done.

The Polish tank didn’t last long, dying in the first exchange of fire, but the tankettes proved surprisingly robust. While the Germans destroyed four and damaged the last, the TKS managed to swarm and destroy one Pz. IV.

Once the Germans numbers were reduced the surviving Polish horse was able to re-enter the fray and do some damage. Among their highlights was sobering one of the German leaders in the woods and shooting up the rear of the last Pz 38(t) after it was damaged.

The game ended with the Poles in secure command of the objective with most of their surviving infantry and leaders. Also surviving were two cavalry squads and two ATG. The Germans had one infantry platoon and the fighter remaining.

Some good luck against the planes was responsible for a surprising Polish victory.

A few thoughts on the Polish units based on this fight:

The Polish Cavalry’s forte was mobility, but they are very fragile. An overly aggressive opening move cost the Poles half their cavalry on Turn 1. More circumspect usage thereafter resulted in them doing good work. A key tactic was to disrupt the target hex and move in during the following turn’s movement phase when there wouldn’t be defensive fire.

The Polish Mausers are your regular AAM standard infantry platoon.  This worked to their advantage because the more colorful units such as the cavalry, tankettes and officers drew fire. At the end of the day, however,  the Mausers were the key to victory, shooting down the Stuka, disrupting the fighter and capturing the objective

The Polish Officers were a disappointment. While only 1 less initiative than the Germans, they only won initiative a couple of times, and once was on a HQ re-roll. Their Coordinated Fire Ability was only used once all game because the officer only has a range of 1.

The 37mm ATG were killers. Every bit as good as similar weapons in other Early War armies, they were devastating against the light German armor. They really had no drawbacks outside the mobility restrictions of the type.  They achieved a 5-1 kill ratio against the German tanks.

The TKS tankettes were also useful. They proved distracting to the Germans and managed to hold their own against the German armor, destroying on Pz IV and contributing to the death of the other.

The ammo dump was very useful and the Germans made  a mistake by not trying to take it out earlier. The Poles seemed to roll an awful lot of “1s”

The 7TP, in contrast, didn’t accomplish much before it died. It was taken out in the first volley and only managed to disrupt a Pz IV.  A single light tank isn’t very useful.

The HQ also didn’t accomplish a lot. One initiative loss was turned into a win, but the other rerolls failed. The pillbox wasn’t tested, largely because the HQ wasn’t deemed worth killing by the Germans. The minefields created a minor headache for the Germans, but nothing notable.

Overall it was fun to finally get to use my Poles, but they aren’t really a competitive build, even with the 15% bonus. Against a more experienced German -- or one with better luck -- they could be expected to lose more often than they win. It’s a very one-dimensional force and one that is especially vulnerable against an armor/air build.


Tuesday, April 16, 2013

Rahman Noodles


Played the El Alamein Rahman Track scenario at the weekly game noght.

As per my usual practice, I adjusted the OB to take advantage of the units available in the newer sets, but this was one of the last official scenarios published, so few cahnges were required.

On the Axis side I substituted two DAK Infantry for the Mauser 98K and Wehrmacht Veteran infantryman of the original scenario. The points were the same and using the actual DAK was an obvious choice now that they are available.

On the Allied side changes were likewise minimal. I replaced one of the Grant I tanks with another M4A1 Sherman because I only have one Grant model and I prefer not to use proxies if they can be avoided. As it happens, the 9th Armored Brigade comprised a mix of Shermans, Grants and Crusaders, so the change was historically justified. The small difference in point value was ignored.

The British deply first, so I placed the Crusaders on the right flank planning to scoot them foward while the Grant and Sherman would go up the middle.

The Axis placed all three infantry units on their left flank where they could advance through the brush while the 88 and two Italian ATG's deployed in the center. THe Axis were planning to advance the ATGs and therefore they were not under cover at first, which proved to be unfortunate. THe 88 was on a small knoll, however, and could benefit from cover rolls.

Things went poorly for the Axis in the initial going. Poor shooting all around meant that the 88 was able to damage the Grant and one Crusader was destroyed by the 47s, but all three anti-tank guns were also lost. The infantry was able to hunker down in the brush successfully.

When the Axis armor arrived on Turn four it found itself badly outnumbered -- the Allies still had three of their original AFV and five more showed up on Turn four.

The Axis decided to mass on the left flank and try to distract Allied fire by moving the infantry out, but the British were able to win a couple of key initiative rolls which allowed them to set up fields of fire that limited the number of Axis shots while nearly all the Allies got a clear shot at something.


Turns 5 and 6 saw a fierce exchange of fire that left the Axis all but wiped out and Allied losses manageable. When the final Panzer II died on Turn 7 the massacre was complete.

The Entire Axis force was destroyed. British losses were three Crusaders destroyed and one Sherman and the Grant damaged.

Tuesday, April 2, 2013

Shot down in the Gap -- session report

Played another session of Axis & Allies miniatures, once again playing an updated version of one of the the old official scenarios. In this case it was Shoot the Gap, from the North African Campaign, NA-3.

Aside from using the V2 models and cards for those pieces that were re-issued in the later sets instead of the ones from the original V1 set, the only change I made from the published OB was substituting Grants for M3 Less now that the historically correct Grant is available. As it's essentially the same as the M3 Lee there was no need to adjust the scenario for balance and it was basically played straight from the book.

It's a pretty straightforward scenario. A British tank-pure force comprised of two Grants, two Shermans and a Crusader have seven turns to fight their way across maps Able-1, Charlie-2, Dog-1 and exit. Opposing them are two German Panzer IVs supported by a trio of Italian Carro Armoato and a single German Pak 38 ATG.

To win the British had to eliminate 4 tanks and exit two. If they failed to do both, the Axis would win, otherwise it was a  draw.

The Axis player sent the three Italian tanks up the north flank, where they were opposed by the Crusader, while my four British mediums dueled with the German units on the southern side.  I'm not usually one to blame the dice, but I really have to say that they failed me this time. Even though I achieved my goal of concentrating my mediums against the German tanks the British simply could not shoot worth a damn.  Specifically, one of the Panzer IVs survived almost three turns under the concentrated fire of all four British  mediums before finally being destroyed. Meanwhile the Crusader also failed to do any more than make an even trade with the Italians.  The only bright spot was that a Grant erased the Pak 38 quickly before it could do any damage.

It soon became evident victory had slipped out of the British grasp, and even a draw was  soon taken off the table when the surviving Axis vehicles pulled out of the line of fire on the last turn after winning the initiative.

At game end the Axis still had a running Panzer IV and an M13 while the Allies were reduced to two damaged Sherman tanks.

Monday, April 1, 2013

Bandit's High first impression


I had a chance to pick up a Starter for the new Bandit's High Starter set for Axis & Allies Air Force miniatures.

Unlike my practice while I was employed, there's a real question in my mind whether I'll be able to collect a full set of these miniatures. Funds are tight and I suspect time is against me as well. As it is, I never filled out the Angels 20 set, being two short -- I never got a FW 190A Wurger or a P-51C Escort and neither is readily available as singles now.

I'm going to have an even harder time picking up sets from Bandits High and I suspect that the run may not be all that large, either.  And I don't see it likely I'll have the money for a case.

Which is too bad, because there are a lot of interesting planes in the new set.

In particular, the new set introduces quite a few aircraft from the minor powers.  Finland, Romania, Bulgaria, Australia, Canada and Poland all get at least one plane.  The French and Italians get filled out a bit while the Germans and Russians get some useful additions as well -- including some ground attack craft.  The set is supposedly Pacific War themed -- and so we do have some iconic American and Japanese aircraft. The key ones, I think, are the P-38 for the US and the Oscar for the Japanese, both of which were common and important.


More once I get a chance to play  a little.

Tuesday, March 19, 2013

Guadalcanal Diary -- AAM style

Co. B, 5th Marines, upper right, and Co. L, 5th Marines, lower left, prepare to advance 
As has been my practice, when I recently revisited the official Axis & Allies scenarios GC-1 & GC-2, which I played together as  a combined game, I revised the OB to account for units now available that were proxied in the early scenarios.

The twin scenarios are unusual, as each half of the scenario has the same OB. There was no need to adjust the Japanese OB, which is comprised on one Imperial Sergeant, four Arisaka Rifles, one Type 89 mortar and one Type 92 machine gun per group.

The American side, on the other hand, had a couple of appropriate substitutions. First I substituted Marine Riflemen for the M1 Garand, now that Marines showed up in Contested Skies, which seems appropriate as the two American forces involved are Co. B and Co. L of the 5th Marines. THe North Africa set finally gave us the M1919 MG to replace the Vickers MG that did so much duty as  a proxy for Allied machine guns in so many scenarios. Each company is comprised of six Marine Rifleman squads and one M1919 MG section. Rounding out each company is the one piece that didn't need changing from the originally published scenario -- the Mortar M2 at one per company.

As the Marine Rifleman cost the same as the M1 Garand and the M1919 MG just on emore point than the Vickers, I daw no need to adjust the Japanese OB for balance.

The maps are the basic Able-2, Baker-2, Charlie-2 and Dog-1, but heavily modified by scenario special rule to turn almost the entire map into LOS-blocking, cover roll-providing terrain. While some hills and town hexes remain unchanged, many others and all clear terrain are turned into forest hexes. As the Forest (Jungle) terrain type had not yet appeared when the scenario was published I left the terrain effects unchanged as "Forest," judging that the mobility hindrances of the later terrain type would have made the scenario unplayable.

This unusually close terrain meant that the mortars and machine guns on both sides lost most of their utility as there were few places where they could fire more than one hex away. The same factor robbed the Marine Riflemen of most of their advantage over the Arisaka Rifle units. The game was going to be a knife fight.

The SA of the Marine Riflemen -- Gung Ho -- seemed to have some promise as it might deter some Japanese attempts to close into close combat due to defensive fire.

The marines have to set up first, so I took that side. I set up the L Company on Baker-2 next to the pond, figuring it was the only place where I might get some ranged shots. B Company set up at the edge of the Hill on Charlie-2. One Japanese platoon set up in Matanikau Village on Dog-1, while most of the other platoon setup just east of the edge of Matanikau in the hexes of Charlie-2 that looked like village but were scenario defined as more woods. The only exception was one Type 89, which set up in the march next to the pond to get a first turn pop shot at the Marines across the pond.

The close terrain, limited mobility of both sides and objective-oriented victory conditions meant there wasn't a lot of fancy maneuvering. Both Marine companies advanced to contact, while the Japanese platoons avoided it until Turn 3, except for the Type 89 mortar by the pond, which was quickly eliminated. Turns 4-6 saw the Marines and Japanese in a heavy firefight along the edges of the villages and the Marines slowly attempted to surround it in order to get Enfilade Fire bonuses (We used the Expanded Rules except for the deadly defensive fire option. ). The Marine succeeded in getting the bonuses but didn't succeed in rolling well enough to take advantage of them. One particularly bad turn of fire saw the Marines fail to do any fatal damage at all and I considered this the turning point of the game, as the Japanese slowly won fire superiority.

The last couple of turns saw desperate attempts by the Marines to salvage something but they fell far shot and, as  it turned out, the final outcome as the Marines were left with a  sole surviving Marine Rifleman squad facing three Arisaka Rifle and one Imperial Sergeant at game end.

It was a good scenario and seemed very evenly matched. When I had played it out solitaire a couple of time each side one, so I it appears well balanced.

Sunday, March 10, 2013

Axis & Allies: Guadalcanal -- Review with an eye to art

"Axis & Allies: Guadalcanal and the other games in the Axis & Allies series are what could be called an artistic interpretation of the historical battles they represent. I use the word artistic because I'm a designer and sincerely see games to be an art form. If these games were paintings they would have been painted with a broad brush indeed." -- Larry Harris in the Designer's Notes for A&A: Guadalcanal, 2007

Like many Boomer generation wargamers, I was primed for exposure to "real" wargames by the neat series of American Heritage games published by Milton Bradley in the 1960s that included the titles Battle-Cry, Broadside, Dogfight and Hit the Beach. None of these was anything resembling a "simulation." Only Dogfight  might be considered a very light wargame by today's standards -- the others were war-themed abstracts more than anything else.

While not being simulations they did, however, provoke an emerging interest, sparked not only by the theme and play of the game -- but by the nice little booklet enclosed in each game that discussed the historical events that inspired the game in the first place.  Broadside and Dogfight led to Midway and Afrika Korps, which in turn led to Strategy & Tactics magazine games and Persian Incursion.

For later generations of wargamers I think the various Axis & Allies series games have played  a similar role. While hardly simulations, they still exhibit a respect and even love of history that shines through despite their highly abstract nature.

A&A: Guadalcanal is not the place to go for a detailed study of the order of battle, tactics or chronology of the Solomons Campaign. Indeed, the name of the game is somewhat of  a misnomer, because it doesn't concern itself with just the fighting on Guadalcanal, unlike the earlier Avalon Hill Game. A&A:G is about the entire campaign for the Solomon Islands -- or at least that's the area depicted on the map board.

This is unsurprising, as the fighting on the island alone is hard to design a good wargame for. The Japanese were essentially campaigning on a mistaken premise -- that the Marine garrison was small enough for the Japanese to defeat. In fact the Allied land force was several times larger than the Japanese thought and the Japanese land forces were never really very close to winning. The contests was much closer at sea and in the air and, really, that's where the campaign would be won or lost. Had the Japanese won  air and sea superiority the the size of the Allied garrison would not have mattered.

Like all Axis & Allies series games, the presentation of A&A:G is very high quality. The distinctive trait of an A&A game is the little plastic toy soldiers and weapons used for playing pieces. Each of the sides has models representing infantry, artillery, AA guns, transports, submarines, destroyers, cruisers, battleships, aircraft carrriers, fighters and bombers. While the AA guns are generic sculpts, the others are distinct by nation and based on historical examples, with the Americans in green and the Japanese in orange. There was a production error that switched the cruiser models, so the Japanese sculpt is in American green and the American cruiser in Japanese orange. This has no effect on play, but free replacements were (and maybe still are) available from Hasbro's customer service upon request.

Even the "correct" models aren't historically precise. The American battleship is depicted by an Iowa class , for example, which did not fight in the Solomons -- nor did the Shinano, which is used to represent the Japanese carrier.

Other key elements of the campaign are depicted by die-cut cardboard pieces -- supplies and airfields.

There are also cardboard control makers, a token to show the first player and "advantage tokens" used as an optional rule. Red and grey plastic chips are used to represent additional units of the same type when stacked beneath them, with far more than will be needed in play provided.

There's a very nicely mounted full-color mapboard showing the Solomon Islands chain from Bouganville to Guadalcanal with two small supplementary base cards for the main bases at Rabbaul and New Caledonia which abut the main map. The map is divided into land areas and sea zones. There are six land ares representing islands or groups of islands and 11 sea zones. The two adjoining base cards each add a land area and sea zone as well for a total of 21 possible locations in the game, which is not a large number by wargame standards.

There are two cardboard player aid sheets and a 28-page lavishly illustrated rule book.

There are a dozen black dice and a unique "Battle Box" which is used to hold them. This is probably the most controversial aspect of the game, with players either loving it or hating it. The basic function of the box is to randomize the dice and then assign their outcomes to specific unit types. This is a departure from the usual procedure in Axis & Allies games which allows the unit's owner to assign hits as desired, which protects the more valuable pieces. In A&A:G a single hit might go straight to that carrier or vital transport you were escorting.

Critics question the randomization provided by the box, because it appears too narrow to really allow a good spin and the general awkwardness of manipulating it. Some players have come up with an alternative system that uses 12 differently hued dice instead.

Overall the game is very attractively presented.

Aiding setup, all the starting locations are printed directly on the map, so setting up should be completed within a few minutes.

Each turn is divided into three phases, with each player taking alternating actions throughout, so there is little of the bane of wargames -- downtime. Both players are fully engaged all the time.

The first phases in MOVEMENT, with the First Player and then the Second Player moving in turn, in sequence: Transports, battleship,s, carriers, cruisers, destroyers, submarines, bombers and finally fighters. Players alternate within each sequence, so, for example, the First Player moves his transports, then the Second player moves transports, then First Player moves battleships, and so on. This creates a lot of scope for strategic play.

Phase Two is COMBAT, which is likewise done in an interactive sequence, although this time divided by target: Attack air units, Attack sea units, unload transports and destroyers and finally Attack land units/airfields. Again, a simple system that creates some interesting tactical decisions.

The Third phase is REGROUP, which like the other phases is conducted through a sequence where each player alternates doing the steps: Determine island control, land air units, build airfields, repair/reinforce/deploy, score victory points and finally, pass the First Player marker -- so players alternate being First Player each turn.

Each unit type has unique characteristics. Infantry, for example, costs 1 reinforcement point to build, has no ability to attack air or sea units and has  a "Land Attack" value of "1," which means it adds one die to number of dice rolled when attacking land units.  In comparison, a battleship costs 12 to build, but adds 1 die when attacking air units, three dice against sea units and 2 dice against land units.

Some units, battleships cruisers and artillery, have a range which allows them to fire into an adjacent zone as well.

Units also differ widely in their movement. All sea units can move one sea zone, while land units can't move on their own at all, but have to be transported. Air units have a range (2 for fighters, 3 for bombers) which they get to use twice per turn, once in the movement phase and then again in the Regroup Phase.

Reinforcement points are earned by controlling islands, starting from a base level of 10, with four per controlled island. Here there was another critical error in the published game, which lists the values as 5 and 2, respectively. Errata with the correct value was published online immediately, although the game is playable with the lower values. Presumably both sides would find themselves starved of resources with the lower figures. Besides getting new units, players can spend reinforcement points to buy supply tokens. Supply tokens, which cost 2 reinforcement points each, are the game's real 'currency' and can be spent to build new airfields, repair ships and airfields and deploy sea units closer to the front. Like any good resource management game, A&A:G will never give you enough supply to do everything, and proper attention to logistics is just as critical as battle management for victory.

Victory is achieved by being the first player to score 15 victory points. The most common way to earn VPs is by controlling an undamaged airfield -- one per airfield per turn. Players can also earn VP by sinking enemy capital ships (battleships and carriers - one each). This builds in a de facto time limit of  four, or maybe five, game turns. Each player starts with one airfield and can easily build 2-3 more shortly, so 15 will likely be reached by one or both players by turn 4 or 5. IF players are tied, they play another turn until the tie is broken.

So that's the basics: A very abstract, military themed game -- or is it a wargame?

It's clearly not a "simulation." No time scale is specified or implied. There's no direct correlation between the game pieces and the historical order of battle. The game''s geography is accurate, but highly simplified.

But there's some fidelity to history, nonetheless. There's interplay between services and scope for combined arms tactics. The essence of the land-sea-air campaign and its components are present and interact with each other. A battleship isn't just differently named than a destroyer but is functionally distinct as well -- something many "real" wargames of the SPI era didn't do.

And there's definitely some game, there. Players have real choices to make and strategies to try.

Five years on, the consumer verdict on Axis & Allies: Guadalcanal is in. It wasn't a breakout hit, but clearly it's not a flop. It appears to be out of print -- the few copies on Amazon are listed for more than $100 and it's not seeing a lot of play on eBay, so getting a copy now may be more trouble than it's worth -- but if you already have a copy I think it would be worth pulling it out again, as it appears to be somewhat underrated. It may not have been enough of  a "simulation" to please many wargamers and yet there's far too much wargame there for most non-wargamer tastes, but there is an interesting game there and a good impressionistic take on the Solomons Campaign. I think Harris' characterization of a game as a form of art is a useful context to use.  Just as a photograph and a painting of the same topic can each provide different insights into a subject, so can different styles of wargames.

Monday, October 15, 2012

Part 2 of the Cape Esperance games

The Kirishima goes down from a  vital hit at close range by the USS West Virginia


Here's the second part of the Cape Esperance commemorative games I recently played.

As always, Andy did an excellent job of writing up the session.

Saturday, October 13, 2012

A little commemoration of the Battle of Cape Esperance -- War at Sea style

The USS West Virginia advances under the steady hand of Admiral Owen in War at Sea


Andy R. and I played a doubleheader of War at Sea Thursday in commemoration of the Battle of Cape Esperance from the naval campaign around Guadalcanal. He reports on the event with one of his fantastic write ups as always.

Sunday, September 2, 2012

Saturday, August 11, 2012

Friday, August 3, 2012

Second A&A air Starter


This image is floating around the A&A boards. Looks legit. it's supposedly off an Amazon preorder site. Looks like this set will be "Bandits High."

As expected, the "large' plane is a P-38. The other American planes appear to be one of the Naval fighters (maybe a Hellcat?) and something that looks like  aP-39 or P-400 to me. This would make sense because that would be plane that could also beef up the Russians without needing a new model.

The Japanese planes appear to be another Zero, the Oscar and maybe a Tony.

Wednesday, June 27, 2012

Mongoose goes 1:1800 scale

HMS Achilles from Mongoose Publishing

Mongoose Publishing, which publishes Victory at Sea, says it will be releasing the first set of its new line of 1:1800 naval miniatures in September with a boxed set depicting the classic Battle of the River Plate.

According to the Mongoose announcement the boxed set will be available at retailers while the company will offer by mail order the sister ships of the various ships that appear in the boxed set.

As regular readers know, 1:1800 is the same scale as the Axis & Allies War at Sea miniatures, so this is good news. But, as the picture shows, the Mongoose miniatures are going to come with a base, and will therefore not be directly compatible with the War at Sea line. This is unfortunate, but not a complete surprise. I suspect Mongoose decided to do this in order to head off the problems the War at Sea line had with the smaller ships when they were not based.

Still, more ships in 1:1800 are a good thing and it's possible that determined players will be able to get around the problem if Mongoose should happen to fill in any notable gaps in the War at Sea line. All the ships at the River Plate have already appeared in War at Sea and the next announced set is The Battle of Denmark Straits, which is also pretty well covered by existing War at Sea ships.

There is no indication that the Mongoose models will be pre-painted, so purchasers will probably have to do that themselves. There is also no indication of the pricing.

The Mongoose blog also mentions that the new edition of Victory at Sea won;t appear until the middle of next year, although no reason is given for the delay. They also recently published a supplement for their World War I version of the game, so Mongoose seems to be making a concerted effort with historical naval gaming. This is a bit of a departure from their usual fare, which is general fantasy and science fiction. (Although they do also have Battlefield Evolution modern tactical rules and miniatures as well).

Sunday, June 24, 2012

Whither Axis & Allies miniatures?

Well, based on this thread, it appears that WOTC has unofficially cancelled Axis n& Allies War at Sea and we won't be seeing a Set 7.

This doesn't come as a complete shock, as indications have been mounting that this was going to be the outcome. WOTC seems committed to coming out with a second set of the Axis & Allies Angels 20 air game, but I'd be very surprised of they keep going after that. While Angels 20 is a good game and has been generally well-received, it's hardly the sort of runaway hit that might make WOTC re-evaluate things.

The entire Axis & Allies miniatures experiment was, overall, a positive thing from my point of view as a historically minded wargamer. The fact that the original Axis & Allies land miniatures  appeared at all, given the popular hunger for dragons, orcs, zombies, space cruisers, superheroes and five-story robot battlemechs, was a fantastic development. Let alone getting multiple sets, followed by the even better naval game and an air game as well.

While naturally wargamers are going to look at this through their narrow lens, I don't think the end of the Axis & Allies miniatures lines has much to do with the lines themselves. They were always a niche line and an inherently small market. They were mostly doable at all because of a unique set of macro-economic factors that made pre-painted miniatures affordable. They took advantage of production lines and procedures pioneered by the aforementioned dragons, superheroes and 5-story battlemechs.

But things have changed. The Great Recession has hit Hasbro hard and the macro-economic dynamics have changed as well. It's not quite so cheap to make things in China as it used to be. The increased costliness of the models in recent sets is a symptom of this, although I don't think it directly caused the demise of the lines -- mostly because I see little evidence that increasing the cost of the boosters by a $1 or $2 per box depressed sales. But that increased costliness may very well have affected sales of the various fantastic lines that A&A was free-riding with and the aggregate effect was the same.

The case of lead Axis & Allies designer Rich Baker helps illustrate this reality, I think. While War at Sea was his main claim to fame in my eyes, from the POV of Hasbro, his main job was Dungeons & Dragons and he was let go because Hasbro decided to go in a different direction after the perceived failure of D&D Fourth Edition.  Now, I'm not a D&D player and I don't have an opinion on D&D 4th edition, but it seems clear that the corporate take was the D&D 4 was a failure.

This "failure" came at a bad time because D&D was already under a lot of stress. Hasbro/WOTC was already backing away from the pre-painted miniatures market -- it seems because of reduced demand and increasing costs (not sure which is the chicken and which is the egg).

But the bottom line is that the historical miniatures lines were never viable as a standalone product and when the much larger D&D portion of the business ran into a rough patch then the historical lines were doomed.

I think the eventual fate of the three historical lines will diverge from this point because of the nature of each game, the usefulness of its models and the strength of their fan bases.

The newest game. Angels 20, has the roughest road ahead. In many ways it's the best game of the bunch. It's easy to play, visually stunning because of the large models and requires a relatively small investment to get into despite the high per0unit costs. The Starter provides a viable stand-along game, for example.

But working against it is the fact that, with just 2 Sets, there really won't be enough options available to keep the game alive. There won't be  enough to satisfy collectors and the game won't be able to cover many important aspects of aerial warfare -- basically being limited to dogfighting. It's not compatible with other lines.  It's entering a market with a couple of other viable alternatives, notably the Wings of War/Wings of Glory line of planes and games. Angels 20 planes are not tremendously cheaper than WoW/WoG and being larger makes them more challenging to store. I expect interest in the Angels 20 to wane and it will, at best, be something that people pull out on occasion but won't have a real community around it.

The prognosis for the land game is a little better, mostly because the miniatures are usable with other rules and the line is big enough to be attractive to collectors. As a game, it's the weakest of the trio. While not  a bad game, it's nothing special in the universe of similarly scaled tactical wargames. Like the air game, I expect that interest in playing the game by the Hasbro/WOTC rules will wane significantly, but players will often hold onto their collections because they can use the models elsewhere. The V1 to V2 scale change hurts the game in this regard. While unimportant within the context of the Axis & Allies minis game itself, it does reduce the usefulness of many of the models for other games. I wouldn't be surprised to see a lot of people sell off their collections down the road, which will be helpful for those who are using the model s for the Flames of War rules.

The naval game, I think, stands the best chance of hanging around as a significant community. The published rules fill a need unmet by any other set for an easy to play tactical naval wargame. The line got large enough over six sets to cover most of the important ships and, while it inaugurated a new scale that is not compilable with previous scales, the development of Shapeways and 3D printing has created a way around that problem. Already craftsmen and entrepreneurs are filling in the gaps. With the Team Poseidon project of new semi-official cards there's reason to think that the naval game is here to stay.

Unlike a proprietary line like Star Wars, Hreoclix or even D&D, there's really no reason at all why other manufacturers can;t make 1:1800 scale warships. Dozens of manufacturers have coexisted for years in the existing model naval wargame market with 1:900, 1:1200, 1:1250, 1:2400, 1:3000, 1:4800 and 1:6000 models. Most lines cover the basics -- just about everybody has a Bismarck or Fletcher class DD -- but each also specializes. Naval wargaming has always been a niche within the niche market of wargaming anyway, but this hasn't been a problem. Partly, I think, this is because of the nature of naval wargames. You really only need  a small handful of ships to have a game-worthy collection, especially if you specialize. And once you pick a scale there's no reason why you can't expand on it indefinitely. 

So I expect the War at Sea line to retain its fan base and even continue to grow, although probably seeing more use as models for other rules as time goes on. Still, I won't be surprised to see games of War at Sea going om 10 years from now, while I'll be very surprised indeed to see any Angels 20 or AAM.

Tuesday, June 12, 2012

In Harm's Way, again

The HMAS Perth (left) and the USS Houston land an early hit on the light cruiser Natori

Another excellent session report from Andy Rucker on his Blog.

I don't have much to add, except to congratulate him on a very convincing victory. Yeah, the Japanese Long Lances were very disappointing, but he took good advantage of the  opportunity and had this been the historical outcome the event would have been remembered as a very glorious chapter in the naval histories of Australia, Netherlands and the USA.

While the Allied squadron was wiped out, just as it was historically, they devastated the invasion fleet and sunk several Japanese warships including a heavy cruiser! This would have been a notable victory at a time when Allied fortunes were riding low.

Saturday, May 26, 2012

War at Sea session report

Check out this excellent session report.

A sample

Game 1 Turn 6

At this point, it was pretty clear this was going to be the last turn; Seth advanced both Prince of Wales towards the center, and the crippled Tirpitz could not get away. In the end, I managed to get enough torp hits to sink one more battleship, but alas a final salvo from the lesser damaged Prince of Wales sent the Tirpitz to the bottom. British victory!


Well, yeah, I picked the game I won. If you want to see the game I lost, see Andy's blog!

Tuesday, April 10, 2012

Axis & Allies miniatures session -- Armored Carjacking

Dutch armored car gets disrupted by defensive fire as it tries to slip by Japanese forces. In the ensuing Assault phase it will be destroyed.

Knocked off a quick game of Axis &Allies Miniatures official scenario DI-2, "Armored Carjacking" at the game shop recently, facing the redoubtable Game Store Tony.

Tony has a soft spot for the Dutch after kicking some Nazi ass in a Memoir '44 scenario last year so he took the Dutch force in this quick, 5-turn scenario based on a Feb. 14, 1942 fight at Palambang, Sumatra.

Her a Dutch force, all represented by British troops, tries to bull its way through a Japanese roadblock.

The Dutch force is comprised of three SMLE rifle squads and a Vickers MG team, all riding in jeeps, which I presume represent light trucks or cars, supported by a Humber Scout Car -- which I presume is also a stand-in for some local Dutch colonial armored car of some sort.

The Japanese are represented by an Imperial Sergent leading three squads of SNLF paratroopers and a Type 92 MG team.

Scenario special rules specify that all the clear terrain on the map is woods, so essentially the significant terrain feature is a single road -- surrounded by woods except where it is surrounded by swamp. The Japanese lie in wait using hidden placement and the Dutch really have little recourse bu to try to fight heir way up the road.

And so the Dutch made their way up the road, leading with a jeep-mounted squad, followed by the MG-team, the AC and the the other two squads.

The first squad was gunned down as it drove by the hidden Japanese but the MG team was able successfully dismount. The Japanese pulled back a little to hide deeper in the trees.

Tony tried a wide outflanking move with one squad mounted on its jeep but they found the going very slow in the trees and by game's end they were deep in the jungle with no chance of getting off the map. The armored car tried a shorter flanking move but was slowed by disrupting fire from the Japanese MG team and then dispatched in close combat. The Dutch MG team was able to infiltrate off the map, but the last foot-slogging rifle squad found itself disrupted far shot of being able to get off the map and the game was called on Turn 4 as it was impossible for the Dutch to win at that point.

Casualties were on the low side for an AAM fight, with just a squad dead on each side, although the Dutch also lost one jeep and the armored car destroyed.

All-in-all a tough-looking scenario for the Dutch. The terrain restrictions really rule out any outflanking moves and the Dutch have to find a way to fight their way up the road.

Friday, March 9, 2012

Palambang or Palam "dud"? AAM session

Things were already pretty grim for the Japanese by this point on Turn 3.

Every so often you just have an off day and turn in an especially awful performance. You're not really an idiot -- or so you tell yourself.

Played the offciial Axis & Allies Miniatures scenario DI-1, Hell Furnaces of Sumatra, set in Palambang, Sumatra on Feb. 14, 1942. My redoubtable opponent was Game Store Tony.

Can't say I had a good plan, the dice were not in the mood to save me from having a bad plan and Tony's not the sort of player who's going to blunder and have a really bad plan himself to salvage your bad plan.

Unlike many of the AAM sceanrios, there's no need to revise the OB in any way to account for the later sets. AAM never got around to the Dutch, so the British proxies will have to remain and the Japanese troops are all basic units.

The scenario opens with a Dutch force of two machine gun teams and three rifle squads defending a 5-hex refinery with an engineer squad busy trying to set demo charges.

The Japanese start with one machine gun team, a mortar team, two Imperial Sergeant leaders and seven squads of SNLF paratroopers. One leader and two squads can start on the same map as the refinery defenders while the rest of the force starts on an adjacent map.

On the fourth turn a couple of squads of jeep-mounted reinforcements arrive for the Dutch from the North.

Well, my thoughts were to rush the defenders with about half the SNLF force, supported by the mortar and machine gun teams while a few squads tried to bushwack the reinforcements. Did I mention I had a bad plan?

Well, the plan started to unravel right from the first as I proceeded to lose the initiative and and Dutch began mowing down nearby paratroopers, including the ill-deployed mortar squad. before long the Japanese were on the ropes and were unable to even successfully ambush the reinforcements. Japanese fire was largely ineffective and the only Dutch casualties were one squad that unwisely didn't dismount from its Jeep and were killed when their trasnpoort was destroyed by the Japanese machine gun. That MG team was also the sole survivor of the Japanese force when the game ended on Turn 7 (of 8 possible). The industrious engineers were able to set demo charges for the entire refinery, although they porbably could have saved themeslves the trouble because the refinery was in little danger.

All-in-all a miserable little bit of generalship by your truly. Hopefully I'll recover and make the next fight a bit more competitive!

Monday, March 5, 2012

Session of revised In Harm's Way scenario

Last turn position


The other day I played a session of my revised In Harm's Way WAS-2 scenario.

I took the Allied fleet, as it seems they have the harder task. The Japanese player was a denizen of the game shop who has played War at Sea before, although he is, like most of the game shop crowd, primarily a Magic: The Gathering player.

As we shall see, he handled the Japanese fleet competently.

A couple of solitaire play throughs while I developed the revised scenario revealed that it was a very poor strategy for the Allies to come in with guns a-blazing as it just freed up the Japanese sooner, so my plan with the USS Houston and the HMAS Perth was to ignore the Japanese pickets and make a beeline for the transports. My analysis of the victory conditions indicated that it was vital to take out all three Transports because they represented a 20-point swing each (8VP for being sunk and 12VP the Japanese DIDN'T get for having the undamaged at the end.)

The Allies got a little luck as the Japanese lost two of the Fubuki-class DD's (proxied by Kagero's) due to the set-up die rolls.

The first turn saw the Allied cruisers slip through a gap in the Japanese line without being within range due to the Night Surprise rule. This couldn't continue, of course, and on the second turn the Japanese got close enough to shoot -- but did no damage. A return shot from the Perth crippled one DD while a maximum range shot by the USS Houston sunk a transport outright.

The loss of 2 ships was more than enough to let the Japanese shock wear off and also brought in the reinforcement group as well -- so the time pressure was on the Allies!

The next turn the Allied cruiser split up, with the Houston taking the more shoreward path while the Perth was towards the center of the channel to draw fire. I wanted to have at least 2 shots on the next turn -- which the Houston's secondary would provide.

The Perth was, of course, buried under a deluge of Japanese fire, but it was mostly ineffective as only one point of damage was caused by gunfire. A long Lance from one of the IJN heavies was all it took, though, to dispatch Perth. The Allied fire was able to damage the Natori, sink another transport and damage the third one, though.

The fourth and final turn saw the Houston continue its "death ride" into the transport area. As it turned out, friendly fire from one of the IJN ships took out the last transport! The Houston, of course, stood little chance of surviving under the IJN fire and was sunk. It's return fire took out one DD.

The final score was 28 VP for the Japanese for the two Allied cruisers (14 VP each) while the Allies earned 30 VP (24 VP for three sunk transports, 2VP for the crippled Natori and 4 VPs for the sunk DD).

The Eversten did not make an appearance as I figured it was very unlikely it would do as much damage as the Japanese would earn for sinking her.

So it ended up being a very close-fought contest. The point total for the Allied force on the revised OB is significantly less than the original scenario (30 VP is all three ships are used instead of 41 VP). The Japanese force is also somewhat reduced in point value but only the cruisers are worth their full VP value for the Allies if sunk. In the original scenario the Allies really have to sink the Natori as well as the three transports while in the revised scenario the transports are enough so long as some damage is also done to the CL/DD covering force.

Saturday, February 18, 2012

Session report for Revised War at Sea WAS-1 scenario

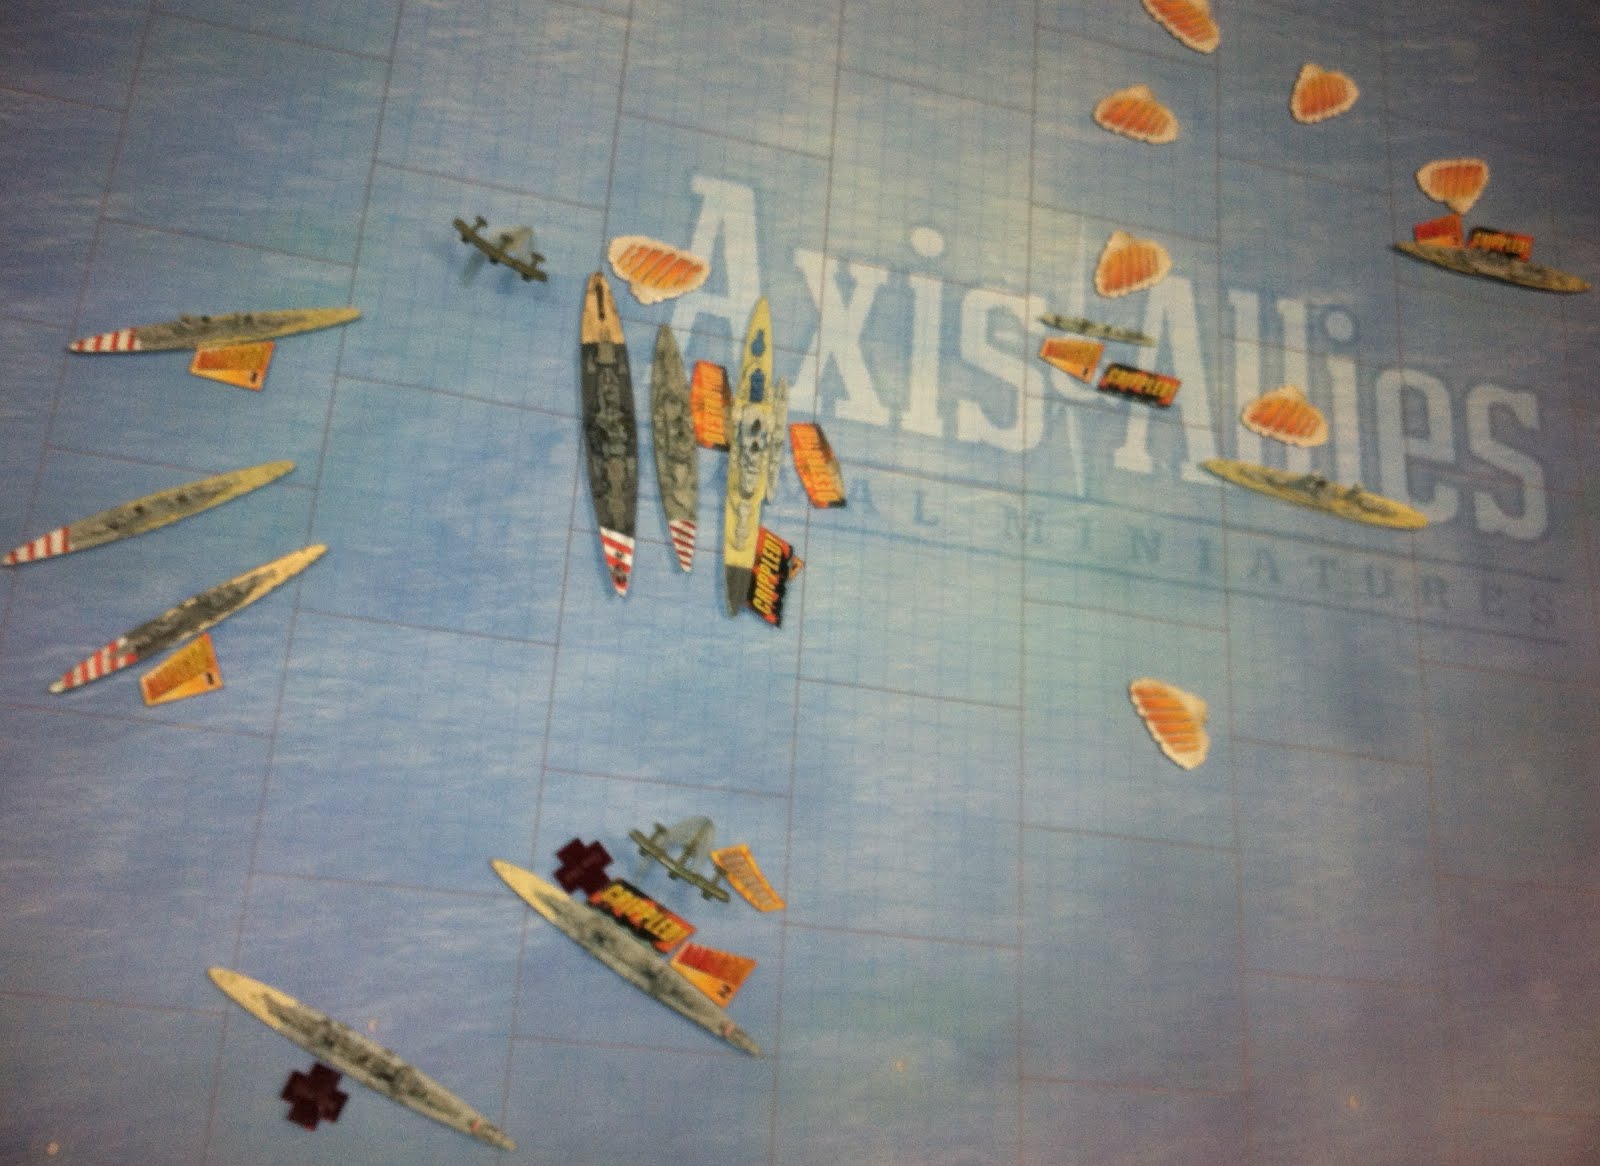
The peak of the action. Map and most of the markers are from Gale Force Nine, while the two red crosses are Litko markers showing that the ship's once-per-game special ability has been used.


Following up on this post, here's a resent session played at Arkham Asylum in Norwich CT. We had four players, so each player took one of the four task forces.

The pre-game die rolls were tough on bost side' destroyer forces. Iachino rolled a '5' and therefore had just two DD's while Campioni rolled a '6' and had just a single DD! The British hardly rolled better, rolling a five and therefore they were down three destroyers!

On the other hand, both sides were pretty fortunate with their reinforcement rolls. The British heavy ships showed up on Turn 3 while the Italian reinforcements arrived on turns 3 and 4. The Swordfish also made frequent appearances, missing just one or two possible turns. The Ark Royal must have been stationed just off the map edge.

The revised scenario seems a little tough for the British to me (as did the original version) but two solitiare playings did result in one British victpory on points, so it hardly seemed hopeless. There are a lot of random variables in the scenario, between destroyer rolls and reinforcement rolls, not to mention the air support rolls. It's also a very large scenario, with four capital ships, 11 cruisers and up to 20 destroyers.

One element that worked against the British was initiative, Despite having only a +1 edge on initiative rolls, the Italians won the initiative all but one time during the game.

Admiral Holland's cruiser force shaded to the north as it advanced, which Iachino's cruisers initially matched. Initial exchanges of fire were fairly even with the Italinas losing a destroyer and the Berwick being crippled and forced to fall back.

Somerville's capital ship/destroyer force soon arrived and started to close, although the Ramillies couldn't seem to make a speed roll (it failed every single one!) an was soon left behind.
Meanwhile Campini's force also arrived on the scene. Taking advantage of their initiative and spped special abilities the Italian cruisers swept south suddenly while the battle line headed straight at the British force. An awful turn of firing saw every single British cruiser miss its shots while the Italians sent two light cruisers t the bottom. This proved to be a major turning point, as it put the Itaians seriously ahead on points. Despite some clever maneuvering and efffective smoke screening by the British destroyers the Italians were able to capitalize on their firepower superiority to continue pounding the British while taking less damage in return.

With the "Limited Opportunity" die roll ending the game on Turn 7 the Italians pulled back to preserve their win. The Renown charged in to boarding range under a hail of Italian fire that left it crippled, but afloat, on the last turn. At point-blank range the Renown clobbered the Guilio Cesare and, with the assist of a DD-fired torpedo, sunk her!

This made the final score somewhat closer than it would have been, with the Italians scoring 112 points and the British 86. The sole survivors on the British side were the cripples Renown, Berwick and a destroyer -- and an unscathed Ramillies. One of the two swordfish also survived.

The Italians were in much better shape. The Vittorio Veneto and two heavy cruisers were undamaged, two cruisers had 1 point of damage and one cruiser was crippled.

While I think the scenario is more challenging for the British, it does appear they have a chance. Bad British luck during the first turn where both cruiser forces were blazing away at each other put them behind the power curve. The British commanders also didn't take advantage of the slight edge they had in reinforcement arrivals to draw the Italian cruisers out of supporting range of the battleships. With the aid of the smoke screening destroyers they could have arranged at least a one-turn firepower advantage. While called light cruisers, the British warships in Holland's task force are comparable in points, firepower and protection to Iachino's cruisers. Holland's task force is worth 63 points, rolls 31 dice at range 3 and all have armor 4 while Iachino's cruisers are worth 85 points, roll a total of 36 dice at range 3 and have armor values of 4 and 5. But add in Renown and the British have another 33 points of ship, with 11 more dice and an armor of 7. It's a fleeting potential edge, however, and in the event the British didn't achieve it.

Overall the revised scenario worked well. It's been suggested that the three Luca Tarigo's in the revised scenario should be replaced with more Ascari's to better reflect the historical OB but in this case so many DDs were removed by the pre-game die rolls that none of the Luca Tarigo's appeared anyway, so it made no difference.

Game ending positions

Wednesday, February 8, 2012

Revised 6-set OB for WAS-1 Action Deferred scenario


Revised 6-set OB for WAS-1 Action Deferred scenario

Changes Bold

Italian

Admiral Campioni’s Task Force

Vittorio Veneto BB

Guillio Cesare BB

Luca Tarigo DD x3 (Freccia, Saetta, Dardo)

Ascari x 4 (Alpini, Granatiere, Fucilieri, Bersagliere)

Italian must split DD lost by scenario special rule evenly with odd number his choice)

Admiral Iachino’s Task Force

Bolzano CA x1

Gorizia CA x 1

Zara CA x 2 (Fiume & Pola)

Trento CA x 2 (also Trieste)

Ascari DD x1

Camicia Nere DD x6 (Carabiniere, Lanciere, Gioberti, Alfiere, Carducci, Oriani)

First 3 DD lost by scenario rule must be Camicia Nere, after that, Italian choice)

British


Admiral Somerville’s Task Force

HMS Repulse BC x 1 (Renown)

HMS Royal Oak BB x 1 (Ramillies)

St. Laurent DD x 5 (Encounter, Faulkner, Firedrake, Forester, Fury)

Vasilissa Olga DD x 4 ( Gallant, Greyhound, Griffin, Hereward)

All Allied DD have Lay Smoke SA; British must split DD lost by scenario special rule evenly with odd number his choice)

Admiral Hollands’ Task Force

HMS Kent CA x1 (Berwick)

HMS Sheffield CL x 3 (also Southampton & Newcastle)

HMS Belfast CL x 1 (Manchester)


British Carrier Support Group

Swordfish Mk. II x 2 (Special rule applies to both squadrons together, i.e. one shootdown or 12 DR affects both units)

Discussion

The official scenarios were published when War at Sea was brand new, as part of the marketing effort, Being so early, they required a crazy amount of proxie and some pretty extreme ones as well. A good example is this scenario, where, as originally published, the American battleship USS Tennessee stood in for the Guillio Casare! I’m not sure how many of these scenarios got played as written anyway because few people would have had the models required, such as FOUR Bolzanos (a rare) or up to 14 Luca Tarigo’s.

I thought it would be interesting to revisit and revise those scenarios now that we have six sets worth of units to choose from In the case of scenario WAS-1, The Battle of Cape Teulada we go from having just one actual ship and a couple of sister ships with all the rest proxies to having no fewer than seven named ships and all the others either sisters or near-sisters with no proxies required at all.

Notes and rationales

Vitttorio Veneto – no change

Guillio Cesare – we now have the actual ship, so it is used.

Luca Tarigo x 3 –can cut down on the number of Luca Tarigo’s now that we have Soldati-class DDs available.

Ascari x 4 – we substitute Ascarisfor the four Soldati-class DDs in Campioni’s task force

Blozano – We only need one now for the actual ship.

Gorizia – actual ship now available

Zara x2 – Two Zaras are used to represent sister ships Fiume and Pola

Trento x 2 – We have the actualship for the Trento and use another one for sister Trieste

Ascari -- we have the actual ship

Camicia Nere x 6 – I think it’s a bad idea to require inordinate numbers of particular model when sister ships are available. Here we substitute a half-dozen Camicia Nere for the other Soldati-class DD’s present. Due to the scenario special rule you’ll always lose at least one DD from each group, so you actually only need four Ascari and five Camicia Nere models in practice.

HMS Repulse – Substitute for sister ship Renown, and as everybody knows, the model is actually the Renown anyway, so we could consider this as having the Actual Ship.

HMS Royal Oak – Substitute for sister ship Ramillies.

St. Laurent x 5 – C class DD substitutes for near sister of the E and F classes)

Vasilissa Olga x 4 (Greek DD substitutes for near sisters of the G and H classes)

I added the Lay Smoke Screen SA as a special rule to keep an important tactic available to the British side that the Javelin DD’s had made possible.

HMS Kent – Substitute for sister ship Berwick

HMS Sheffield x 3 – One is the actual ship, with the other pair representing sisters Southampton and Newcastle.

HMS Belfast – Substitute for sister ship Manchester

Swordfish Mk. II x 2 – I doubled the number of Swordfish to make up for the increased point differential between the two sides cause by the various substitutions and also because the British carrier Ark Royal was the carrier present, not the Illustrious. Optionally you can add the Ark Royal and one more Swordfish to Admiral Somerville’s Task Force and skip the special rule, although I am not sure this helps the British overall.